Getting I2C-based LCD to work with ESP32 and display BME280 Measurements
In THIS ARTICLE, I will tell you about my attempt to fix a problem with using I2C LCD that has plagued two of my previous projects: that of the dim display. I will then use it to display BME280 measurements in the LCD. This project is part of a course in embedded systems guided by the excellent Dr. Kusprasapta Mutijarsa, S.T, M.T. of the Bandung Institute of Technology (ITB).
Review of the problem
The crux of the problem is that the display of the characters is so dim as to make it illegible.

As it was also in the middle of midterms — meaning that I had very little time to spend finding solution alternatives — I immediately gave up. But now that things are being taken care of, I started to look into it again.
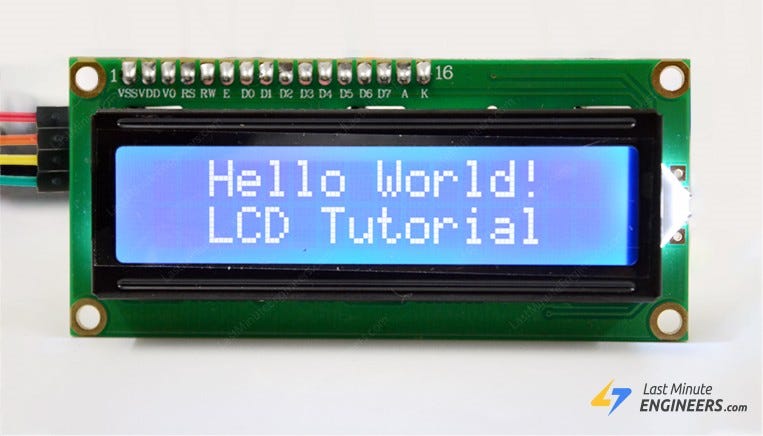
Upon closer inspection, this is because the letters didn’t light up in a bright white manner as seen in common internet examples. In fact, they didn’t light up at all. Compare this to an example from the internet:
As such, primary suspicion befalls upon the fact that my circuit still uses 3v3 as opposed to a 5v power source based on the USB. That is until I accidentally messed with the jumper cable and discovered this phenomenon.
It turned out that if you mess with the software a bit by inducing catastrophic electric shocks (and thus resulting in the apparition of eldritch celestial hieroglyphs), you CAN get the LCD to start displaying white-enlighted characters. I then try to exhaust the possible solutions behind this problem.
Prerequisites
- An ESP32 microcontroller, along with its vertebrate
- A 16×2 LCD, complete with its I2C serial communication bus (soldered!)
- A breadboard
- A Micro-USB cord
- A few male-to-male jumper wires
- A few male-to-female jumper wires
- A few 3mm LEDs
- A few 330Ω resistors
- Arduino IDE installed for ESP32. I have made a detailed installation guide in my previous article: https://zhillan-arf.medium.com/blink-the-led-with-esp32-5c3f358ea2ff
Setting up the LCD
I set up the LCD physical wirings using this arrangement:
- ESP32 GPIO26 ← → LCD SDA (Green)
- ESP32 GPIO25 ← → LCD SCL (Yellow)
- LCD GND and VCC outlets to their respective ESP32 pins. This time however, I used the Vin outlet as opposed to 3v3. This necessarily means that I had to reposition my microcontroller in the breadboard.
I then I first plugged the device in, sure enough, things are looking good.
Now, I already know the port to be used for the I2C adapter to LCD: 0x27. However, just in case, I ran the port finding test using the below code. Of course, the default I2C pins are GPIO 22 (SCL) and GPIO 21 (SDA), both of which are unusable due to the positioning of the microcontroller, so I reconfigured them to GPIO 34 and GPIO 35 by modifying the code to include Wire.begin(SDA, SCL);.
#include <Wire.h>

void setup() {
 Wire.begin(26, 25);
 Serial.begin(115200);
 Serial.println(“\nI2C Scanner”);
}

void loop() {
 byte error, address;
 int nDevices;
 Serial.println(“Scanning…”);
 nDevices = 0;
 for(address = 1; address < 127; address++ ) {
 Wire.beginTransmission(address);
 error = Wire.endTransmission();
 if (error == 0) {
 Serial.print(“I2C device found at address 0x”);
 if (address<16) {
 Serial.print(“0”);
 }
 Serial.println(address,HEX);
 nDevices++;
 }
 else if (error==4) {
 Serial.print(“Unknow error at address 0x”);
 if (address<16) {
 Serial.print(“0”);
 }
 Serial.println(address,HEX);
 }
 }
 if (nDevices == 0) {
 Serial.println(“No I2C devices found\n”);
 }
 else {
 Serial.println(“done\n”);
 }
 delay(5000);
}
Sure enough, it appeared, and showed the port address of 0x27.

I then plugged this sanity test. Again, I reconfigured the default wiring using the Wire library.
#include <LiquidCrystal_I2C.h>// set the LCD number of columns and rows
int lcdColumns = 16;
int lcdRows = 2;// set LCD address, number of columns and rows
// if you don’t know your display address, run an I2C scanner sketch
LiquidCrystal_I2C lcd(0x27, lcdColumns, lcdRows);void setup(){
 // initialize LCD
 lcd.init();
 // turn on LCD backlight
 lcd.backlight();
}void loop(){
 // set cursor to first column, first row
 lcd.setCursor(0, 0);
 // print message
 lcd.print(“Hello, World!”);
 delay(1000);
 // clears the display to print new message
 lcd.clear();
 // set cursor to first column, second row
 lcd.setCursor(0,1);
 lcd.print(“Hello, World!”);
 delay(1000);
 lcd.clear();
}
This was the result!

…well, it’s still not perfect. But it’s certainly an improvement — now I can do things like “read the LCD”.
Connecting the LCD with BME280
Conveniently, BME280 also uses I2C communication protocol. This means that as long as I know its address, of which I can use this code to obtain it:
#include <Wire.h>//Set pins for LCD
#define BME_SDA 26
#define BME_SCL 25
TwoWire I2C_LCD = TwoWire(0); //LCD bus
TwoWire I2C_BME = TwoWire(1); //BME busvoid setup() {
 I2C_LCD.begin(LCD_SDA, LCD_SCL);
 I2C_BME.begin(BME_SDA, BME_SCL);
 Serial.begin(115200);
 Serial.println(“\nI2C Scanner”);
}

void loop() {
 byte error, address;
 int nDevices;
 Serial.println(“Scanning…”);
 nDevices = 0;
 for(address = 1; address < 127; address++ ) {
 I2C_LCD.beginTransmission(address);
 error = I2C_LCD.endTransmission();
 if (error == 0) {
 Serial.print(“I2C device found at address 0x”);
 if (address<16) {
 Serial.print(“0”);
 }
 Serial.println(address,HEX);
 nDevices++;
 }
 else if (error==4) {
 Serial.print(“Unknow error at address 0x”);
 if (address<16) {
 Serial.print(“0”);
 }
 Serial.println(address,HEX);
 }
 }
 if (nDevices == 0) {
 Serial.println(“No I2C devices found\n”);
 }
 else {
 Serial.println(“done\n”);
 }
 delay(5000);
}
Resulting in the address of 0x76:

I can set up and use this code to display the measurements of the barometric sensor.
#include <Wire.h>
#include <SPI.h>
#include <Adafruit_Sensor.h>
#include <Adafruit_BME280.h>
#include <LiquidCrystal_I2C.h>
#define BME_SCK 13
#define BME_MISO 12
#define BME_MOSI 11
#define BME_CS 10
#define SEALEVELPRESSURE_HPA (1013.25)
Adafruit_BME280 bme; // I2// set the LCD number of columns and rows
int lcdColumns = 16;
int lcdRows = 2;// set LCD address, number of columns and rows
LiquidCrystal_I2C lcd(0x27, lcdColumns, lcdRows);unsigned long delayTime;void setup() {
 Wire.begin(26.25);
 Serial.begin(9600);
 // initialize LCD
 lcd.init();
 // turn on LCD backlight
 lcd.backlight();
 while(!Serial); // time to get serial running
 Serial.println(F(“BME280 test”));
 unsigned status;

 // default settings
 status = bme.begin(0x76);
 // You can also pass in a Wire library object like &Wire2
 // status = bme.begin(0x76, &Wire2)
 if (!status) {
 Serial.println(“Could not find a valid BME280 sensor, check wiring, address, sensor ID!”);
 Serial.print(“SensorID was: 0x”); Serial.println(bme.sensorID(),16);
 Serial.print(“ ID of 0xFF probably means a bad address, a BMP 180 or BMP 085\n”);
 Serial.print(“ ID of 0x56–0x58 represents a BMP 280,\n”);
 Serial.print(“ ID of 0x60 represents a BME 280.\n”);
 Serial.print(“ ID of 0x61 represents a BME 680.\n”);
 while (1) delay(10);
 }

 Serial.println(“ — Default Test — “);
 delayTime = 1000;
 Serial.println();
}
void loop() {
 printValues();
 delay(delayTime);
}
void printValues() {
 // Temperature
 lcd.setCursor(0, 0);
 lcd.print(“Temp. (°C)”);
 lcd.setCursor(0,1);
 lcd.print(bme.readTemperature());
 delay(1000);
 lcd.clear();// Pressure
 lcd.setCursor(0, 0);
 lcd.print(“Press. (hPa)”);
 lcd.setCursor(0,1);
 lcd.print(bme.readPressure() / 100.0F);
 delay(1000);
 lcd.clear();// Altitude
 lcd.setCursor(0, 0);
 lcd.print(“Alt. (m)”);
 lcd.setCursor(0,1);
 lcd.print(bme.readAltitude(SEALEVELPRESSURE_HPA));
 delay(1000);
 lcd.clear();// Humidity
 lcd.setCursor(0, 0);
 lcd.print(“Hum. (%)”);
 lcd.setCursor(0,1);
 lcd.print(bme.readHumidity());
 delay(1000);
 lcd.clear();
}